Welcome to Coco Alemana
Get started and learn the basics of Coco Alemana.
Create a Project
Section titled “Create a Project”To start using Coco Alemana, create a project via the New Project... button, or any time via File -> New Project... or by hitting Shift-⌘-N. You can save this project in any location on your computer.
Load Data
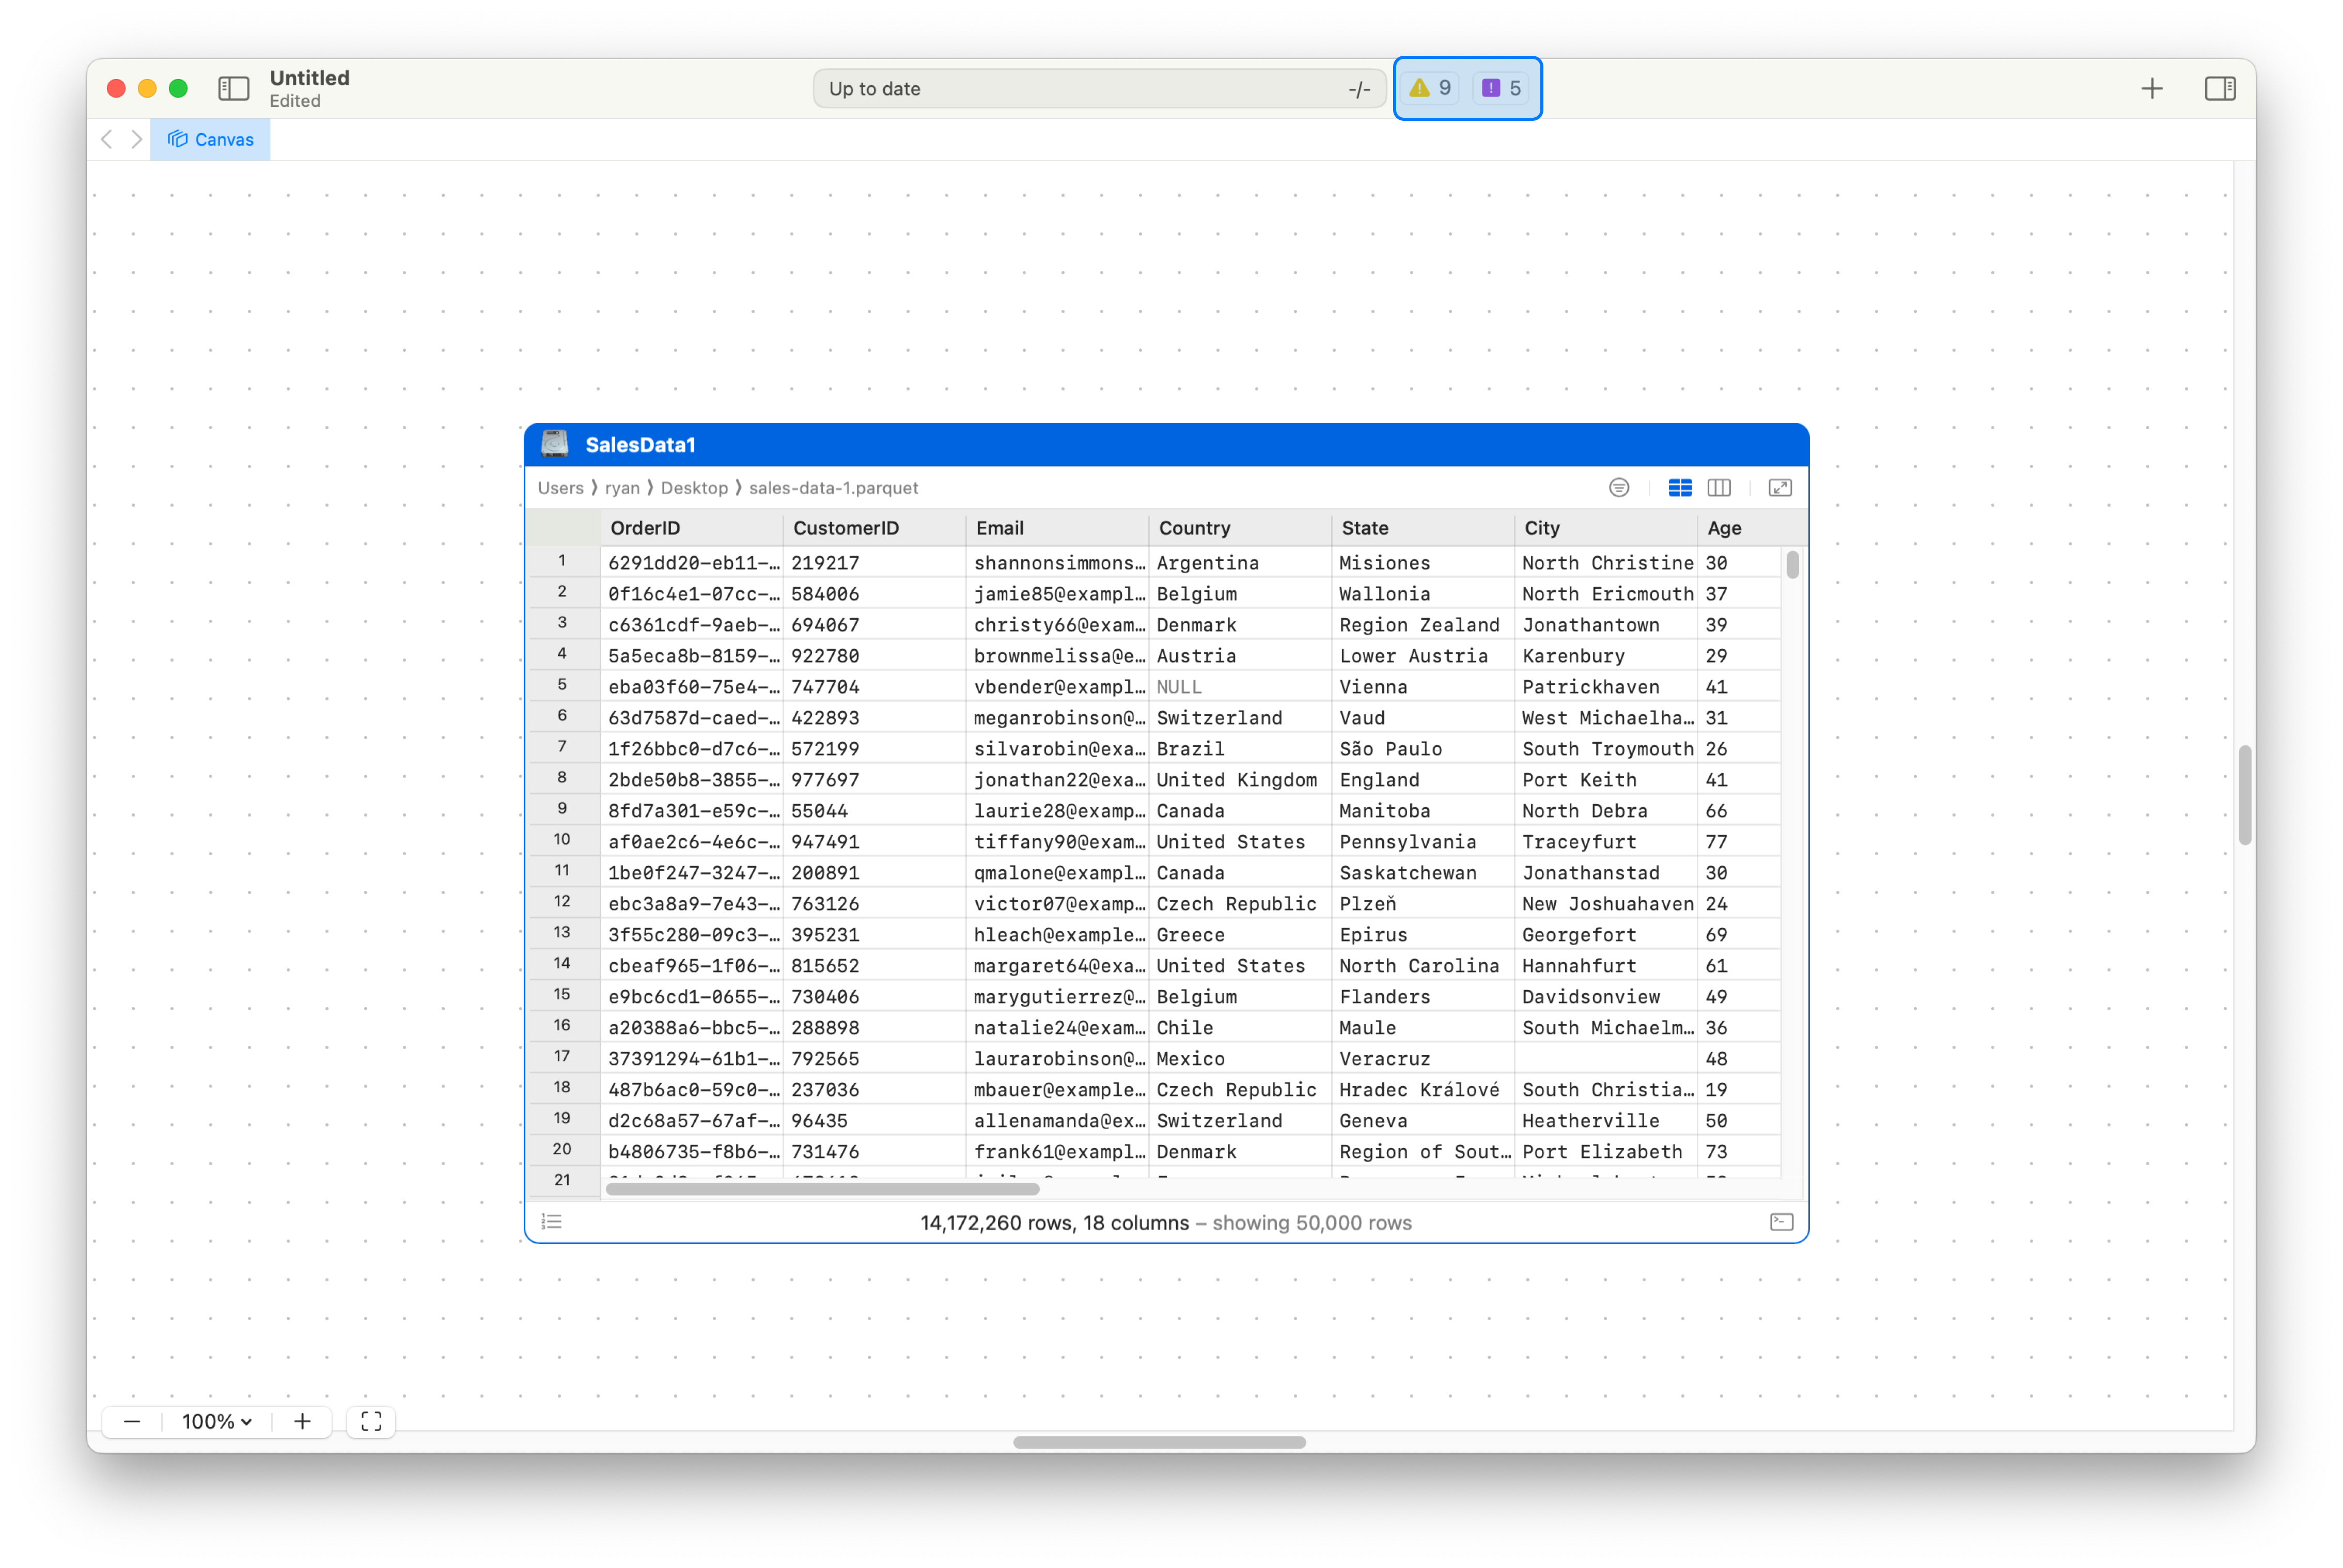
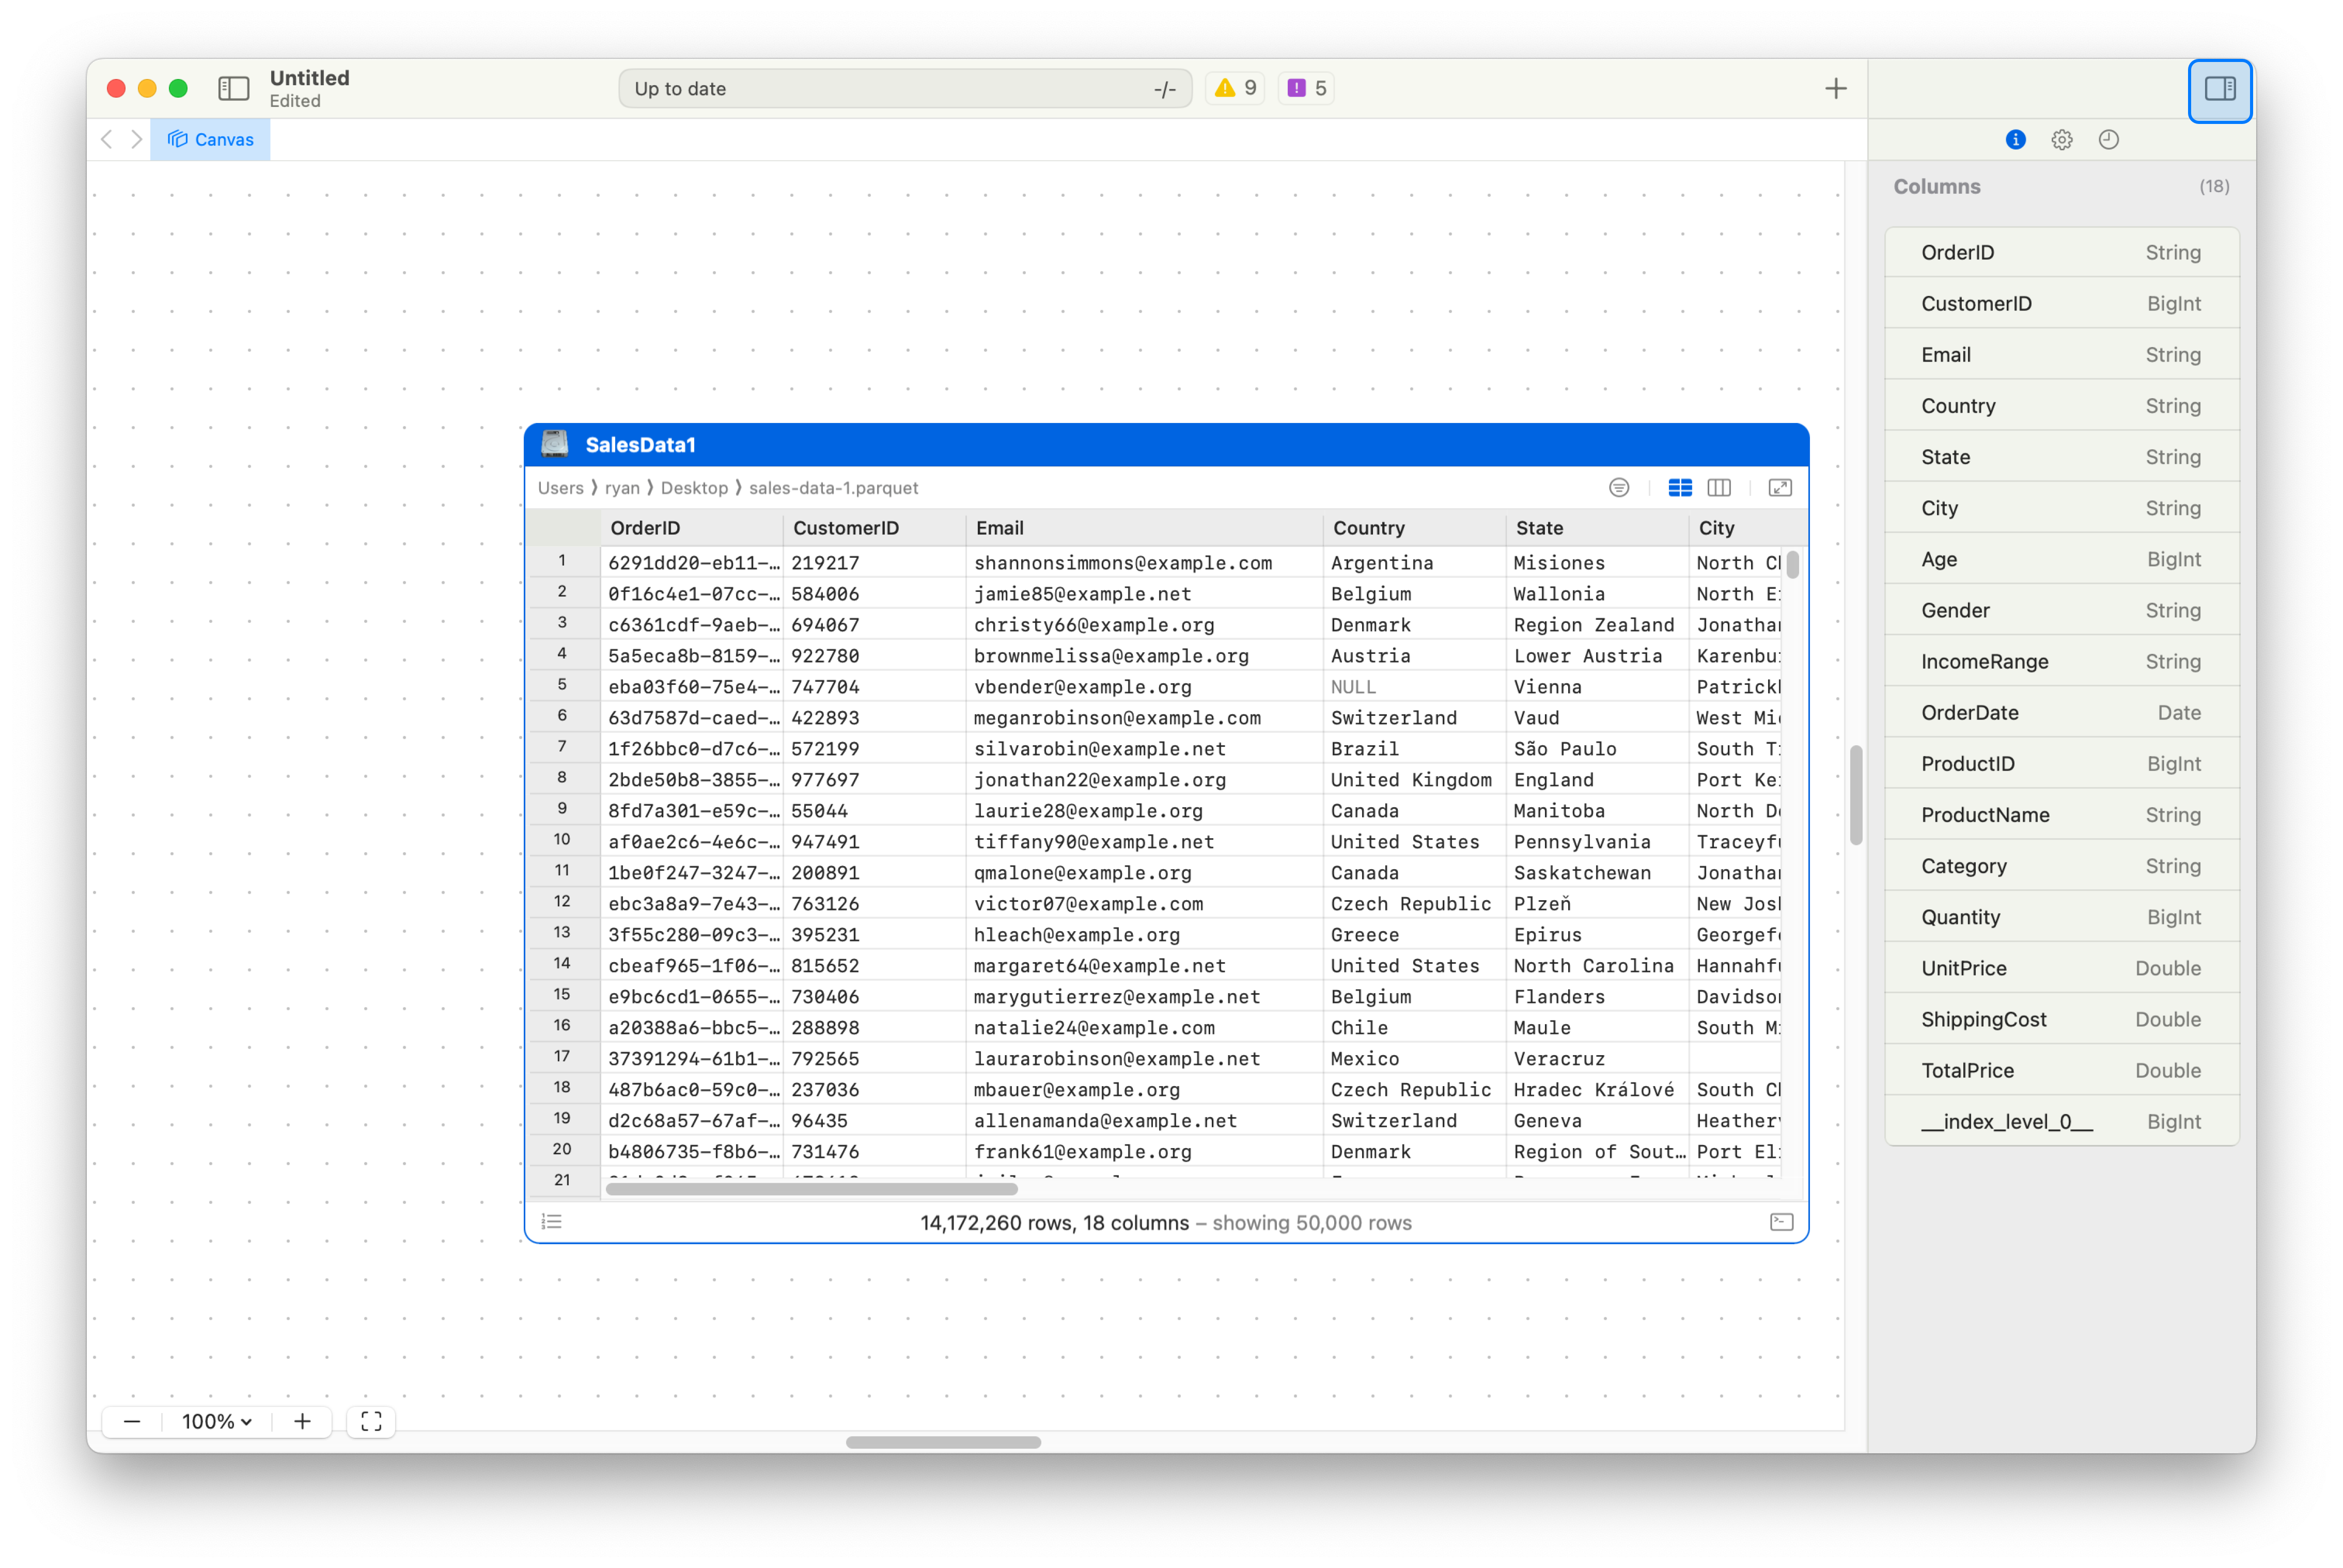
Section titled “Load Data”You can load data into Coco Alemana by pressing the top-right ”+” button, or clicking the Import Frame in the center of an empty canvas. Importing data can also be done via File -> New Source, and has a keyboard shortcut of ⌘-N. If you have Parquet, CSV, or Excel files on your computer, you can drag them directly onto the canvas as well.
You can choose files from your Local computer, or remote sources. For info on how to load from remote sources, please see Athena, BigQuery and ClickHouse guides.

Advisories
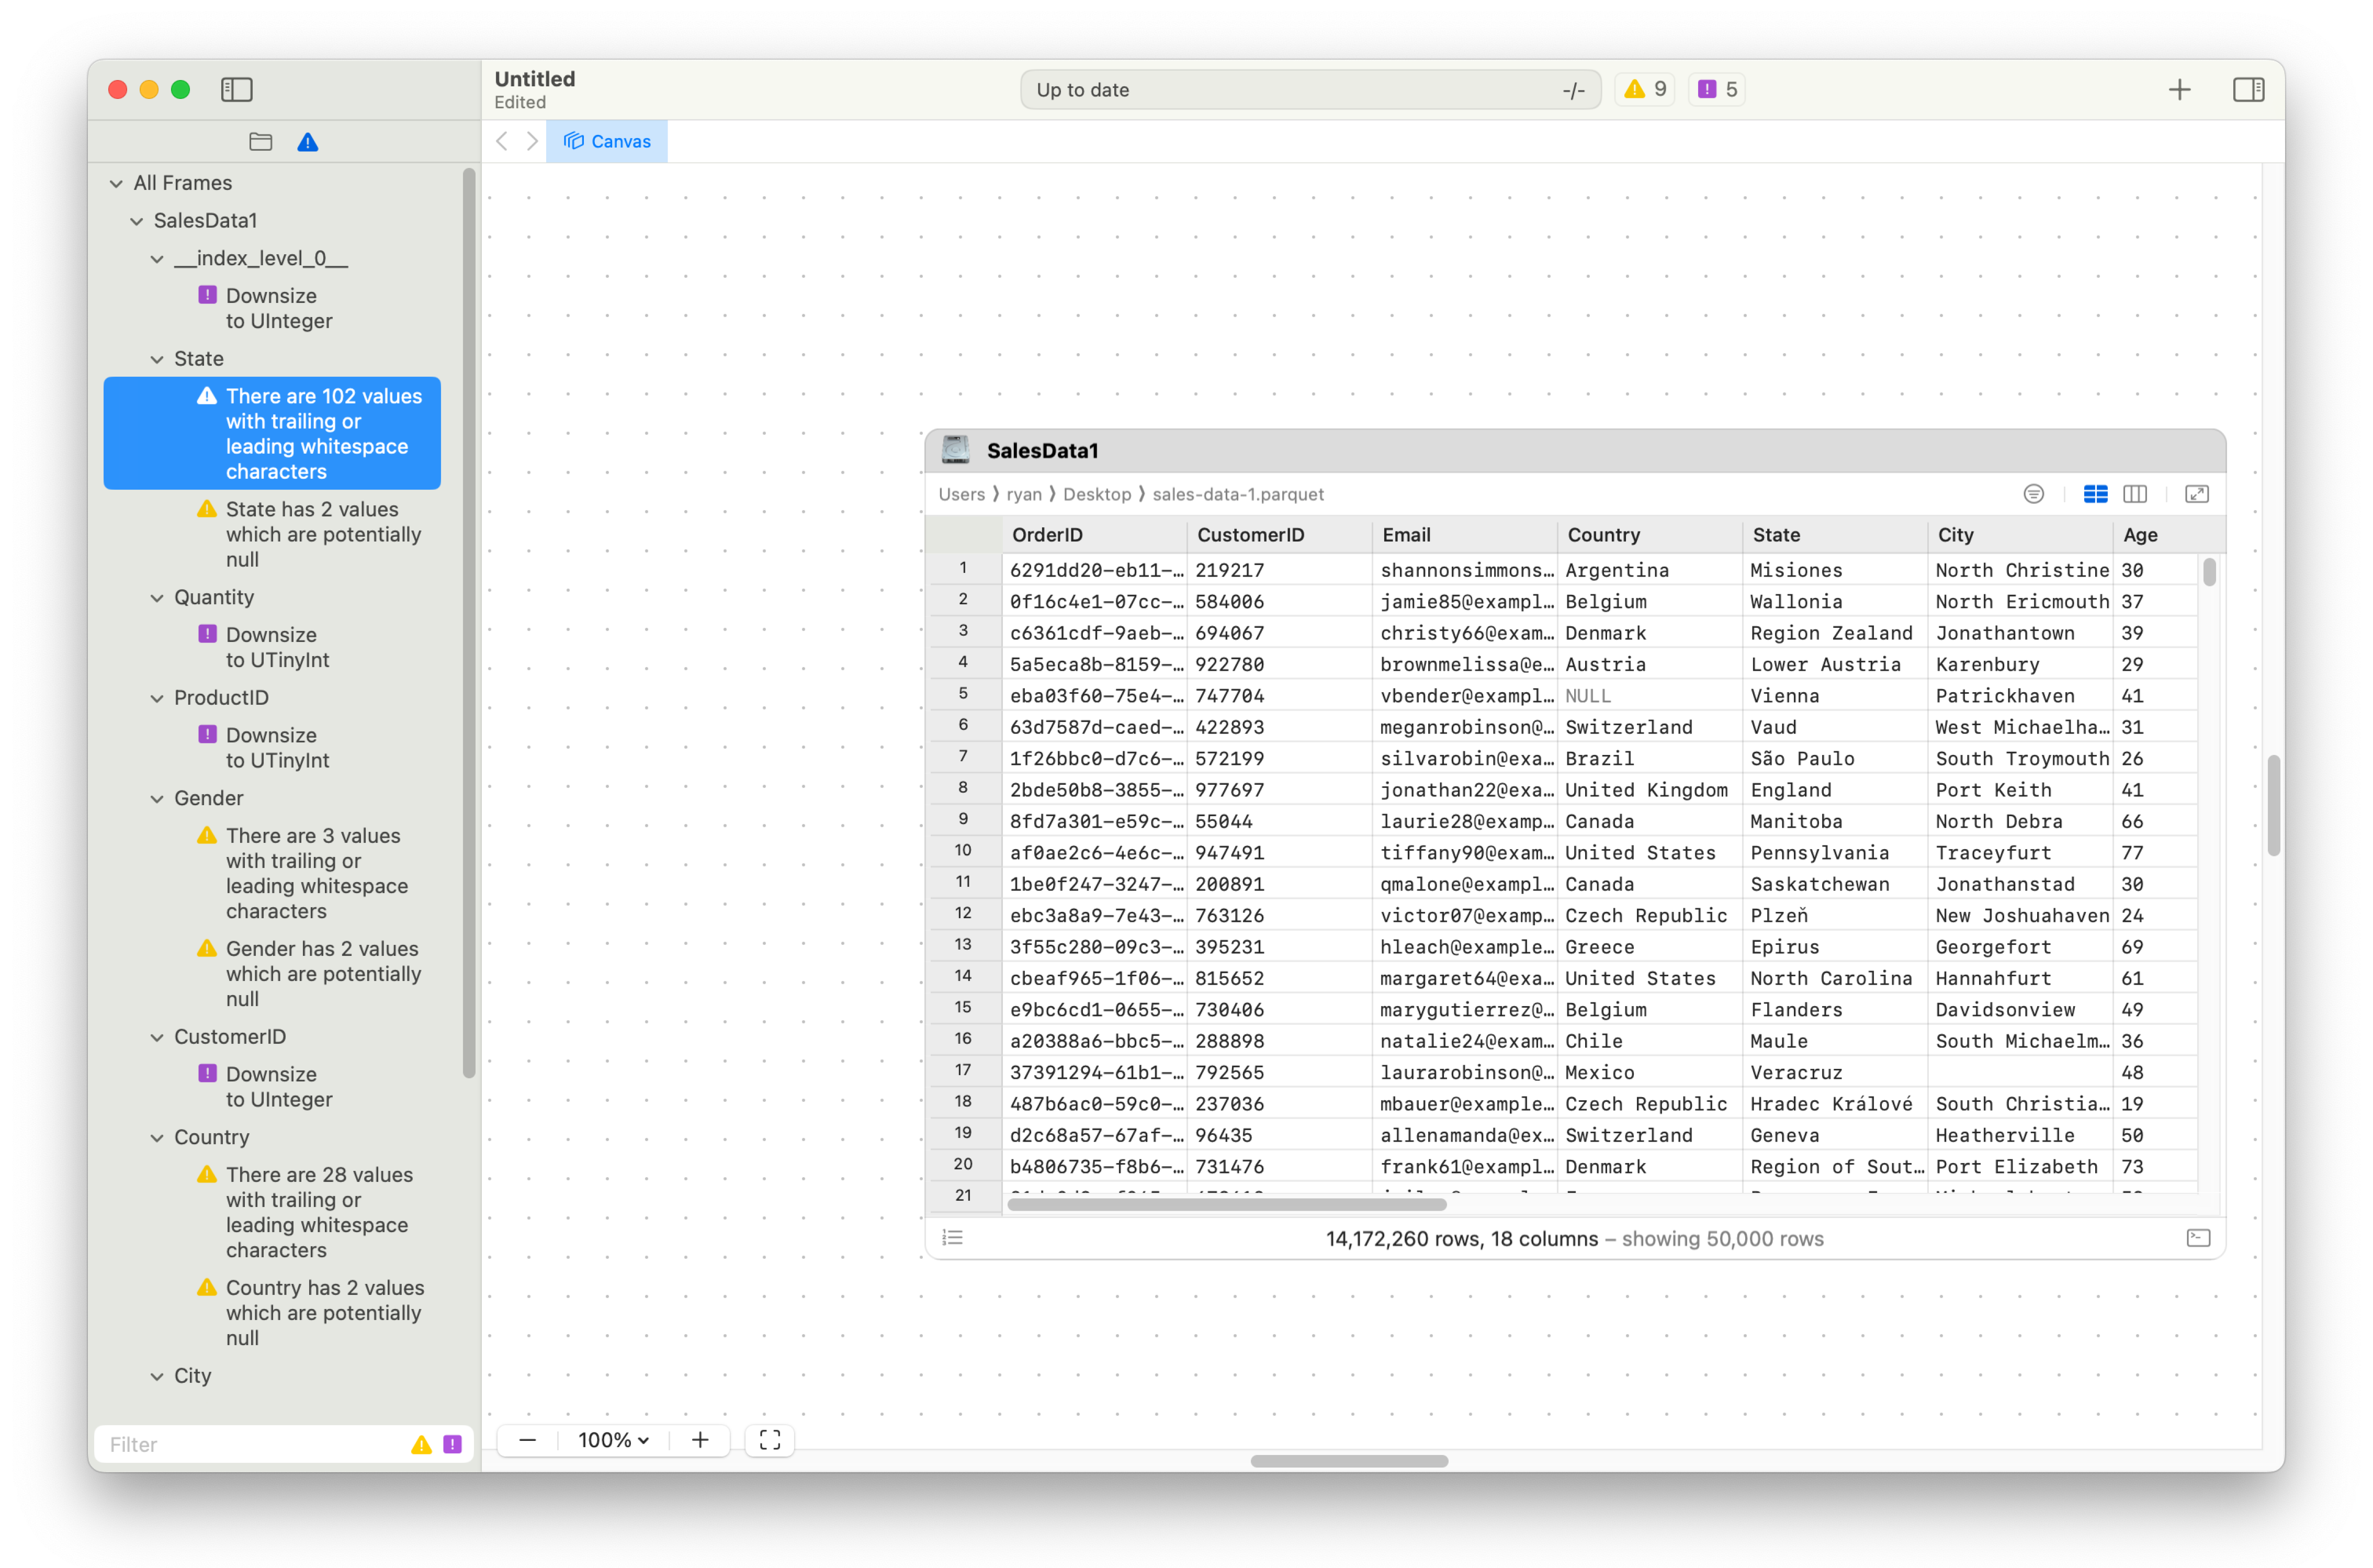
Section titled “Advisories”Advisories are warnings and suggestions about your data that Coco Alemana suggests on an on-going basis. Common data issues, such as excess whitespace and potential NULL values are generated on your behalf. You can see a quick preview of these in the top status bar.
Status Bar Summary
Section titled “Status Bar Summary”In the top status bar, you can see a summary of the amount of warnings and suggestions you have for all of the frames in your project. Warnings are generally issues which could affect an analysis, or a potential “gotcha”. Suggestions are those which could impact performance, or other non-critical info.
Advisory Center
Section titled “Advisory Center”The advisory center is located in the left side panel of the application. If you click on the advisory items in the status bar, this pane will open.
Viewing an Advisory
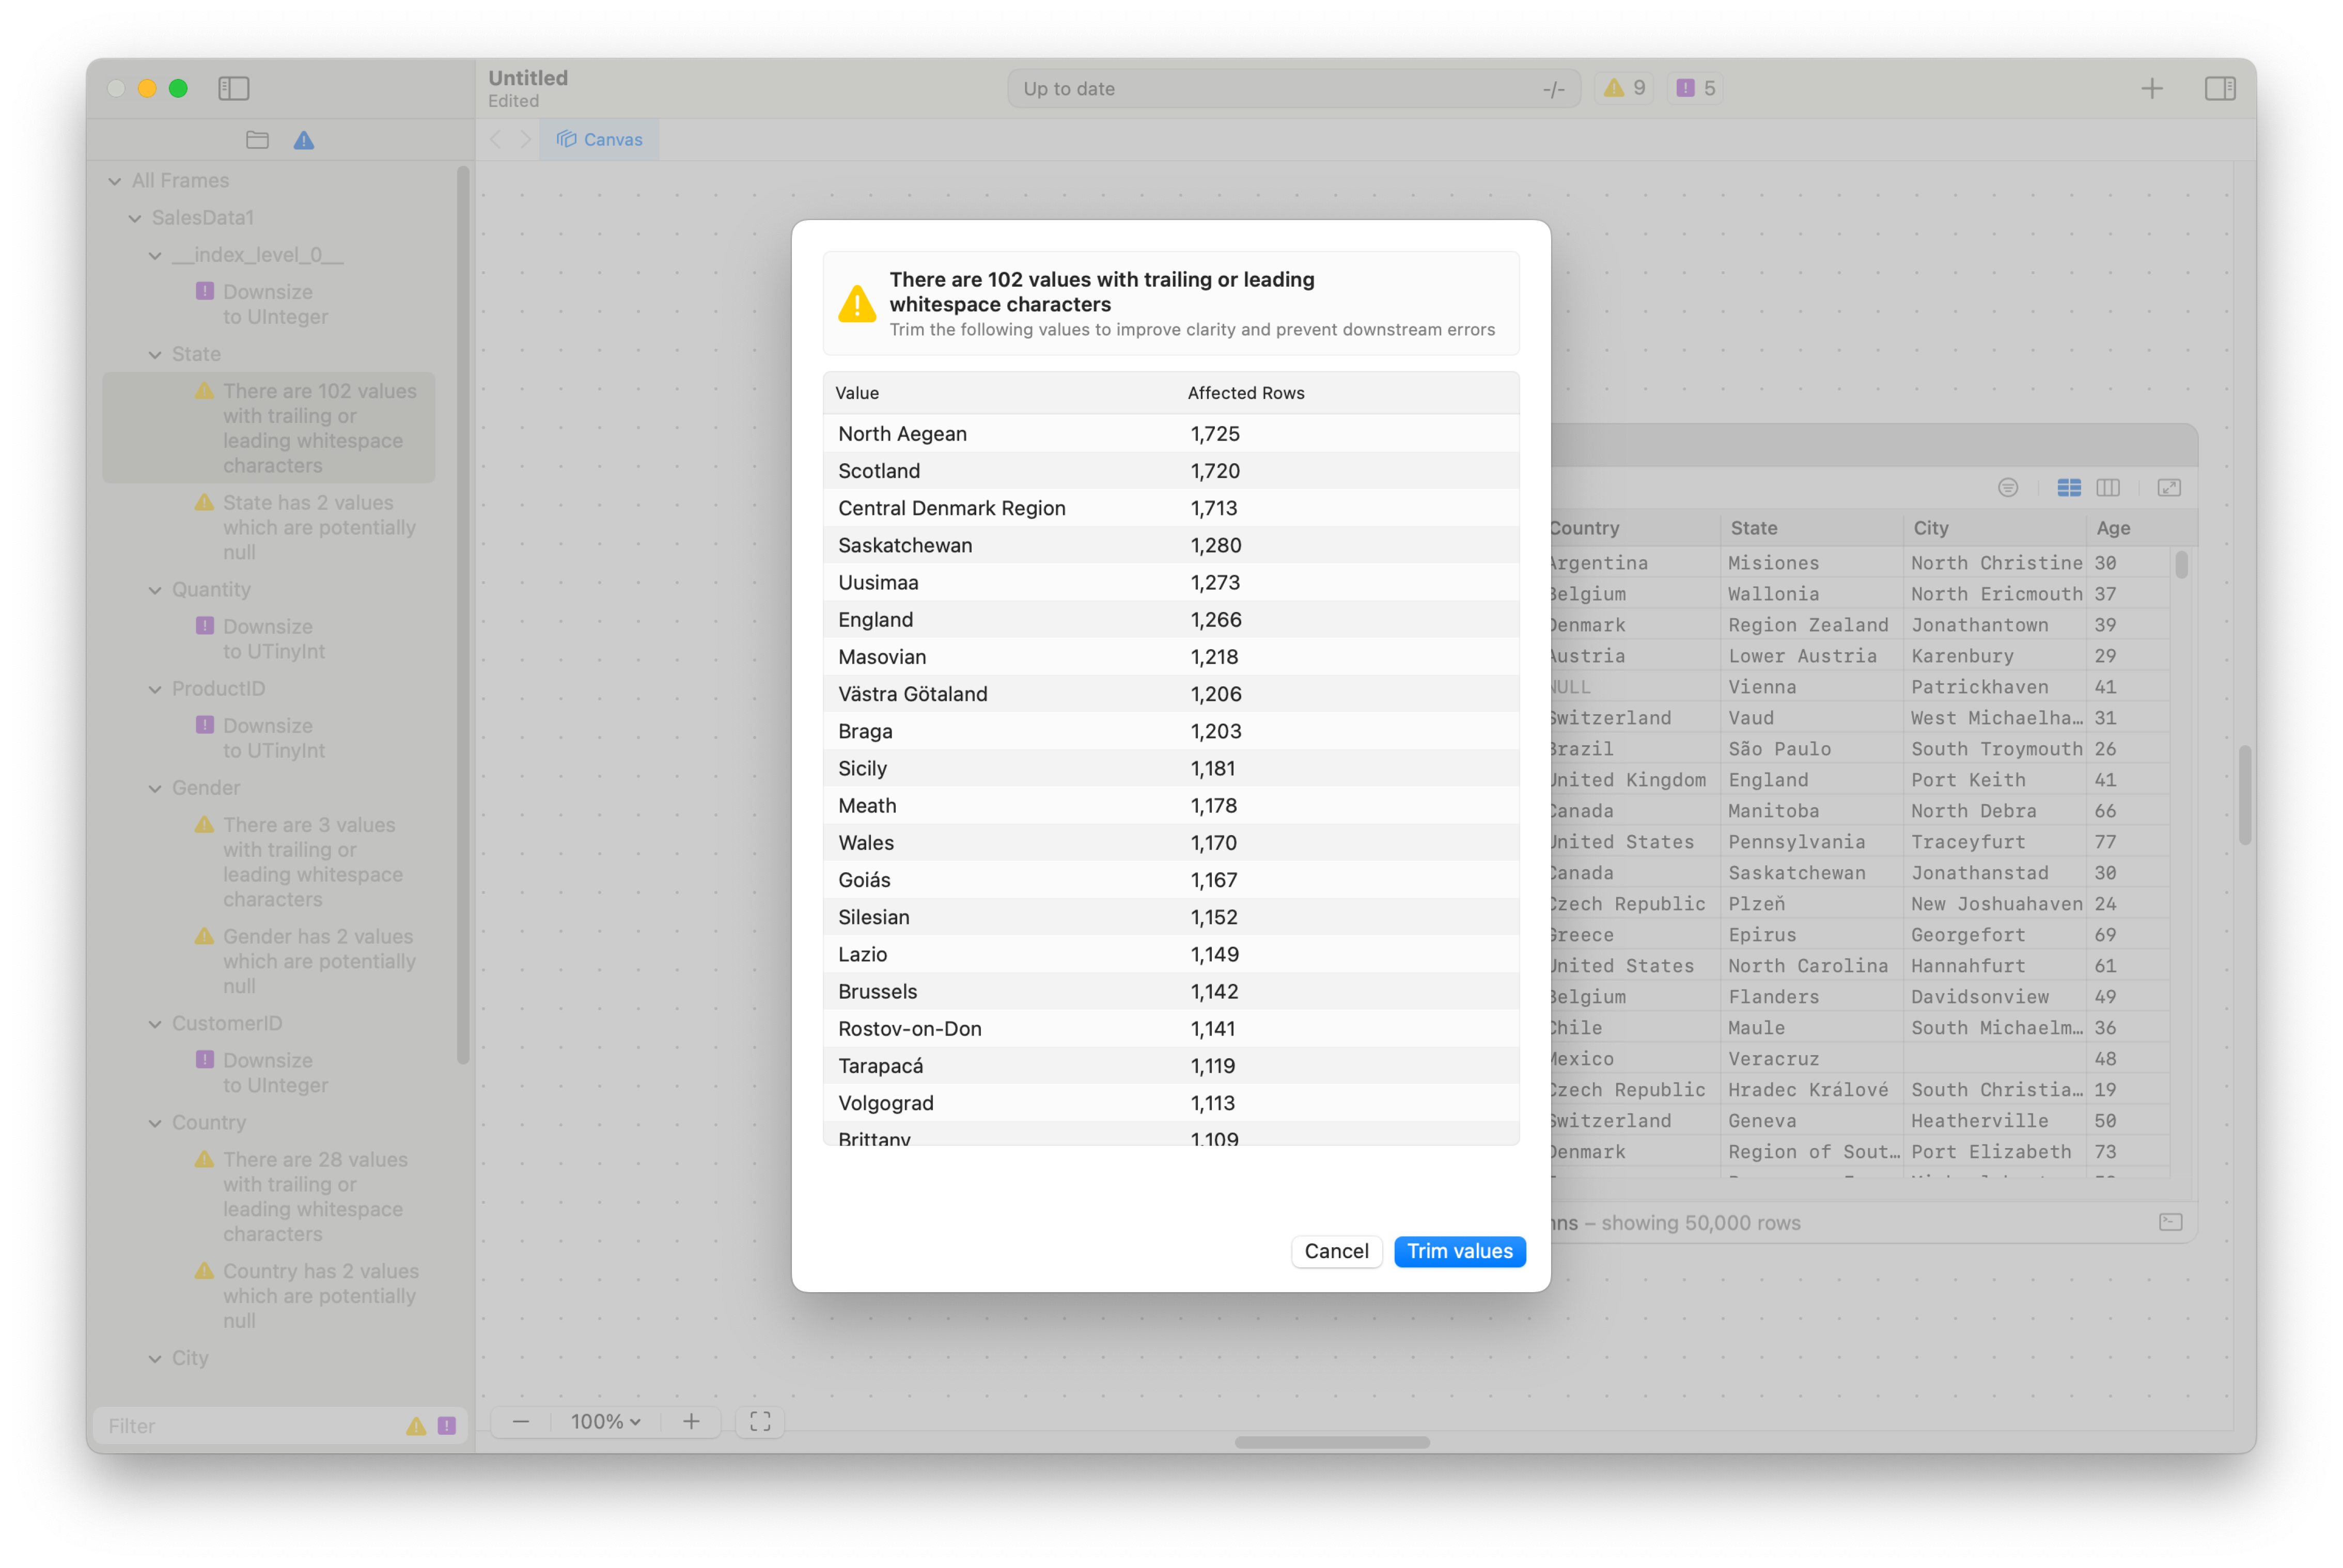
Section titled “Viewing an Advisory”Double clicking on an advisory will show a preview of the issue, along with a button to automatically resolve it. The resolution differs based on the advisory type.
Viewing the Schema
Section titled “Viewing the Schema”The right-hand side pane contains three sub-sections. “Schema”, “Formatting” and “Change History”. The first option “Schema” contains the list of all columns in the currently selected frame. You can re-order these columns, rename them, delete them, cast, or clean them from this pane.
Opening a Frame in “Full Screen”
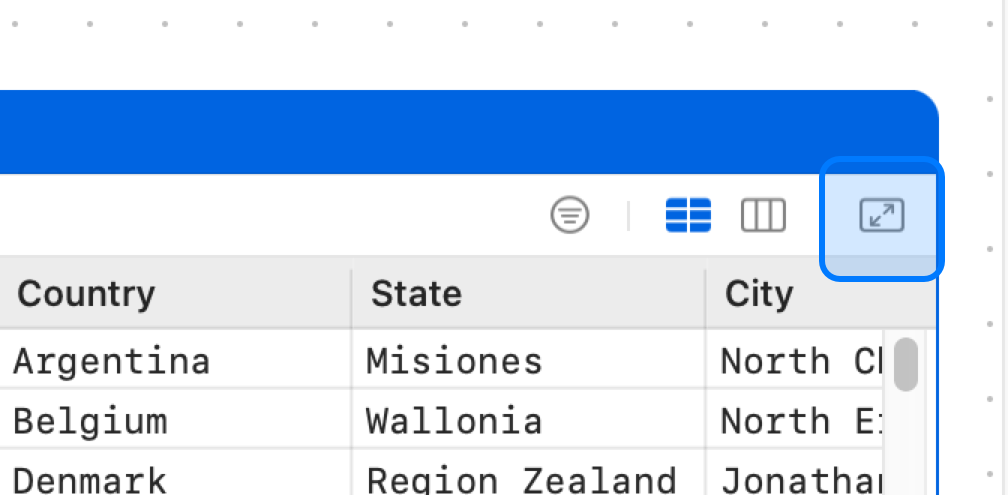
Section titled “Opening a Frame in “Full Screen””Instead of relying solely on the canvas, you can open any frame in a larger view by pressing the open in a new tab button on the frame’s header. You can also right-click the frame, and select Open in Tab, or press ⌘ T while selecting the frame.
Distributions
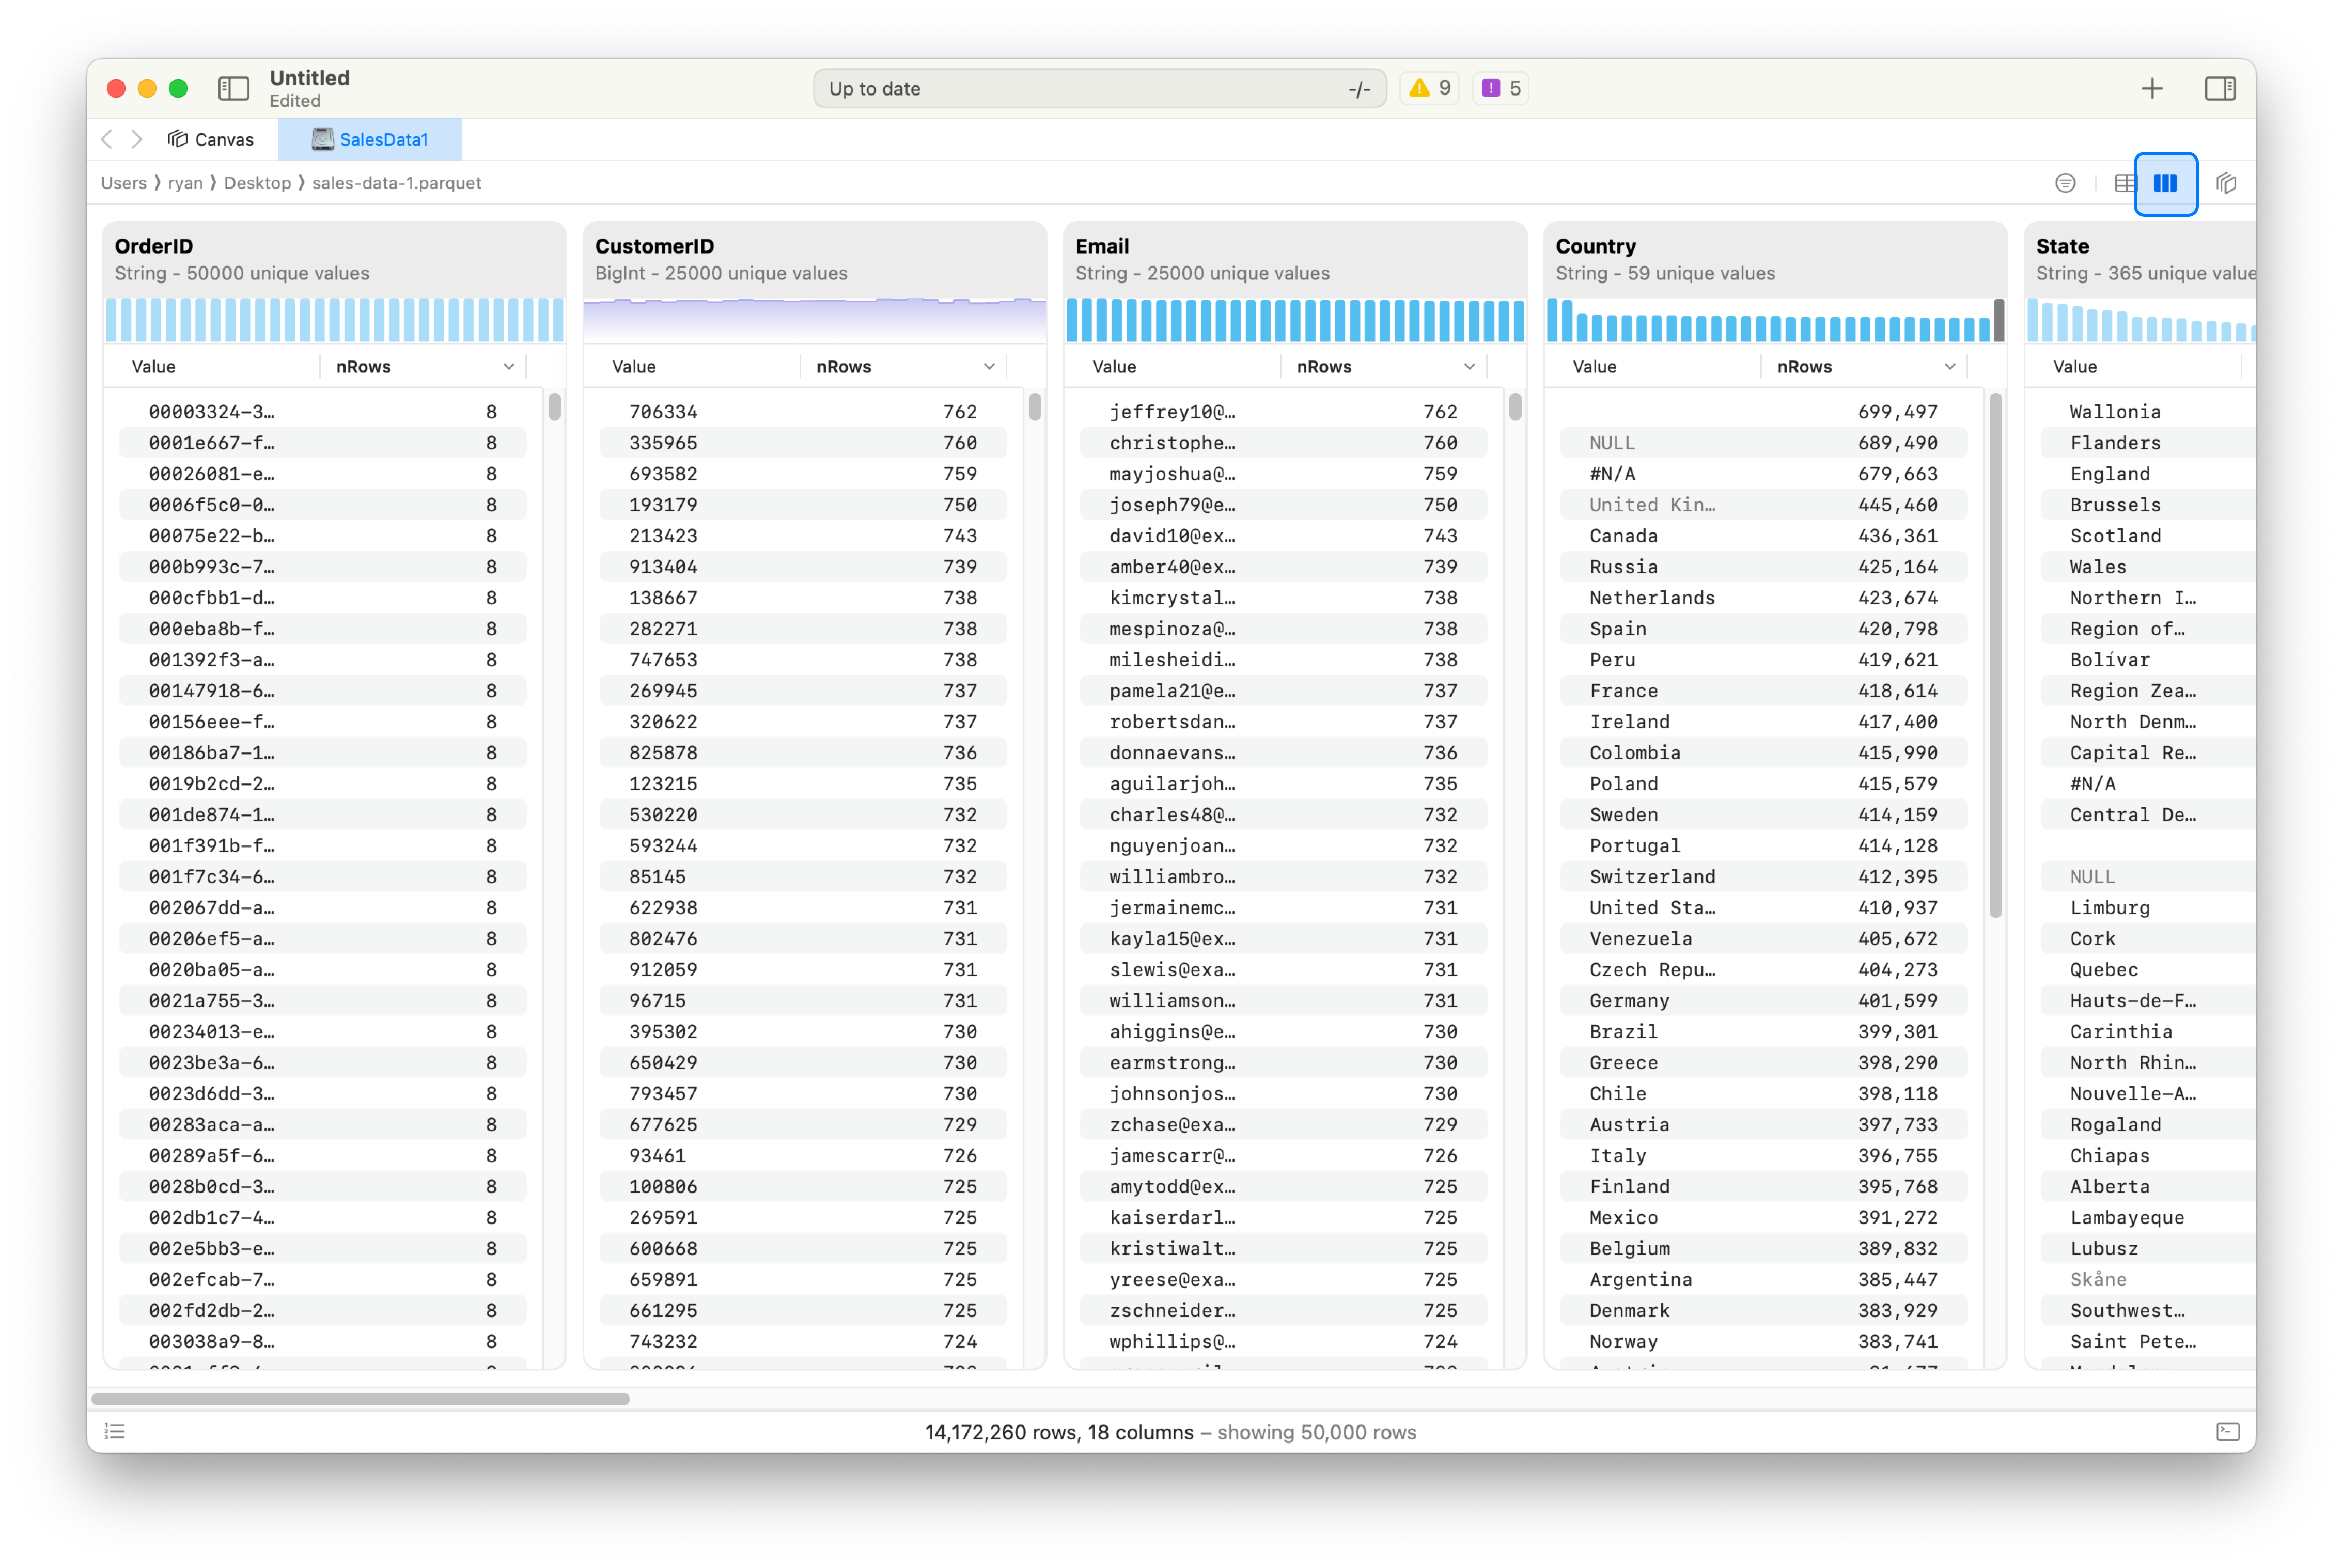
Section titled “Distributions”By default, frames show preview records - usually 50,000 - but this can be up-to 1 million. However, it’s often incredibly useful to see the distribution of values, via value counts, and binned continuous distributions for your columns. Coco Alemana automatically generates this for you. You can switch “views” to see the “Distribution View”, by clicking the associated icon.
Creating a New Column
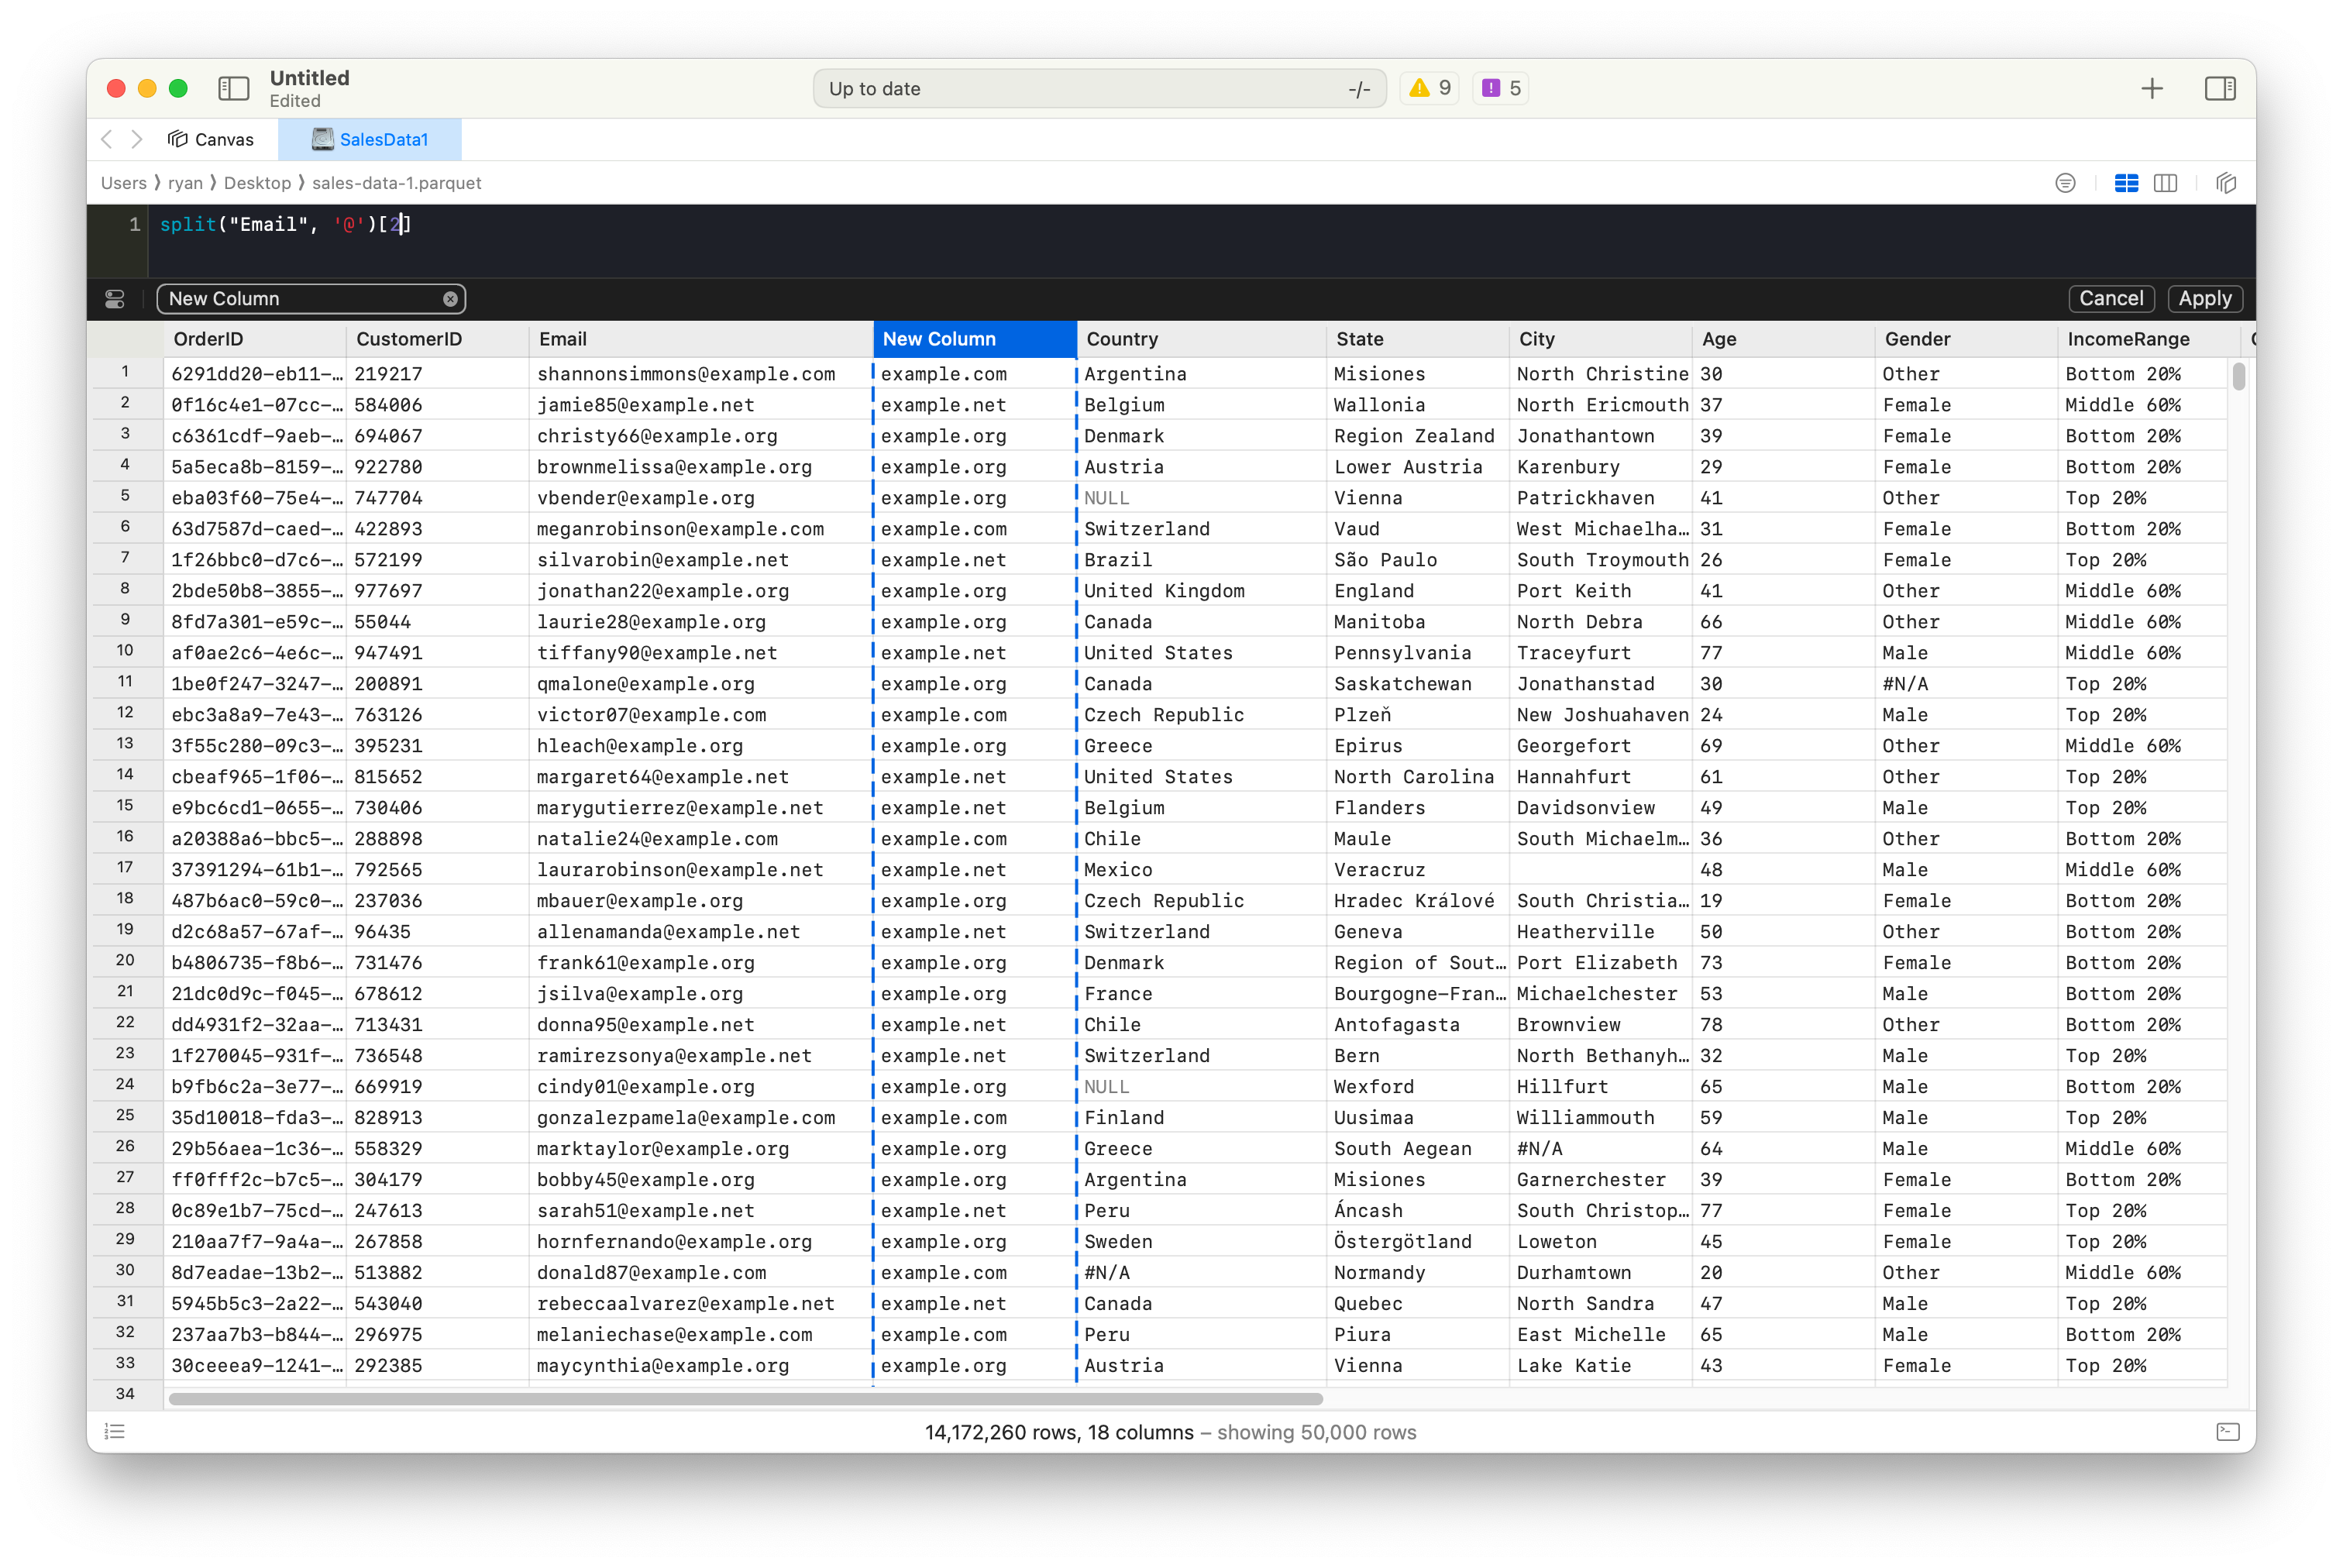
Section titled “Creating a New Column”If you’d like to create a new column, you can do so from the preview view. Select a column, right-click, and select Insert. A view should appear above the frame, prompting you to provide an expression. This is very similar to Excel, where scalar expressions are provided to modify existing data.
Here, the scalar function references entire columns, instead of cell values. Coco Alemana cannot work with cell values.
As you type, you will see a live preview of the results. You can apply those results to the frame by hitting the Apply in the bottom right.
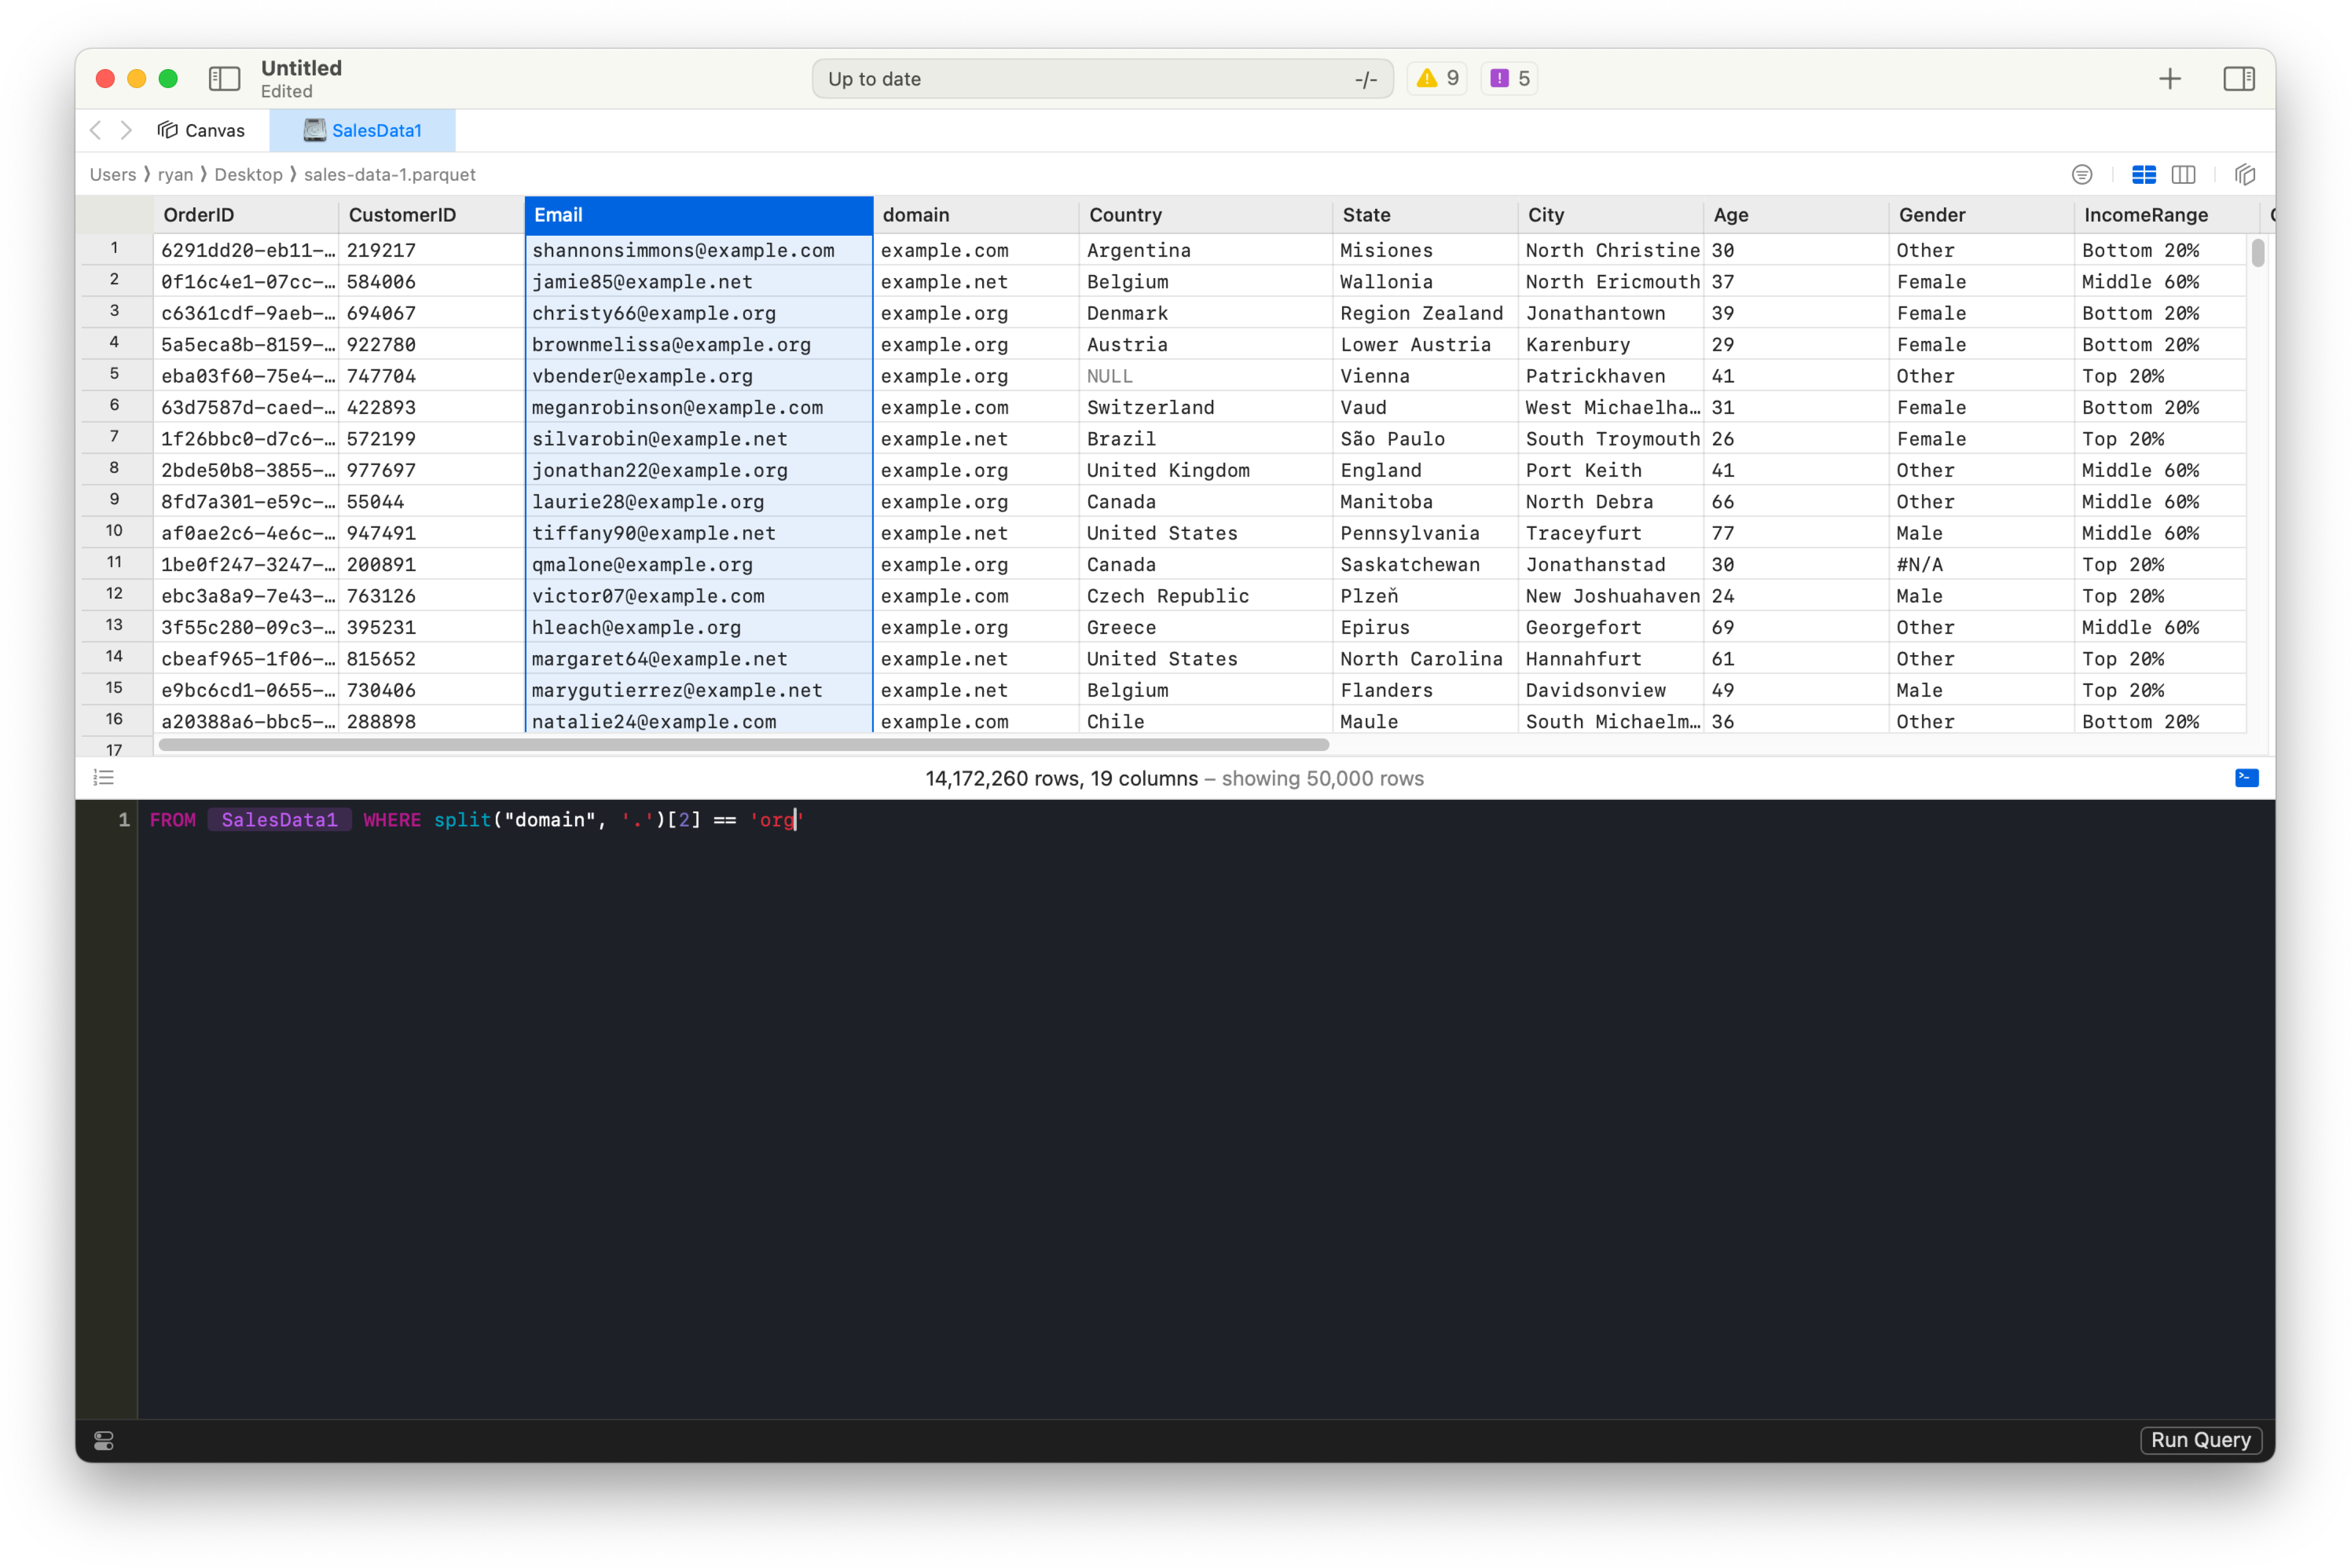
Writing a Custom SQL Query
Section titled “Writing a Custom SQL Query”For cases where more flexibility is needed, you can write a custom SQL query. You can open the editor panel by pressing the button on the bottom-right hand side of the frame. You can also activate it by pressing ⌘ E while the frame is selected.
SQL statements are written in CocoSQL, a dialect which auto-translates to the underlying data source. This means that you can write a query against a Parquet file, Athena, BigQuery or ClickHouse without changing the dialect.
You can run the query via the Run Query button in the bottom right, or via ⌘ Return. This will show a preview set of records. You can then apply the query to the frame via Apply.
You can also re-run queries, or make changes before “Applying”. This can be particularly useful when you’re constructing your query.
Exporting
Section titled “Exporting”Once your frame is modified to your liking, you can export it to a format of your choosing. If you’re working with remote sources, you can create entirely new tables, or export to a local copy as well.
To export, select your frame, and click File -> Export.... You can also export via Shift ⌘ E, or by right-clicking the frame and selecting Export....
You can specify between different formats:
- Parquet (recommended)
- CSV
- Microsoft Excel (.xlsx only) - not recommended
Save your Project
Section titled “Save your Project”Be sure to save your project periodically. Saving your project doesn’t save data, but saves your progress. This means if you’ve done substantial work, you’ll be able to pick up from where you last left off.
See More
Section titled “See More”If you found this guide helpful, you might want to see the following guides and references…
- Working with remote data like Athena, BigQuery and ClickHouse
- Merging Data Frames
- Writing custom queries with CocoSQL